With the BadgeOS Open Badge Integration, you can issue open-badge compliant, verifiable badges. These badges contain digital information that is unique to the badge recipient and can’t be modified. As a result, they can be used to validate skills, knowledge, employment, and participation in online education programs. In this article, you’ll learn how to set up and use the Open Badge Integration with BadgeOS.
You can learn more about Open Badges here.
Table Of Contents
- Enable The Open Badge Integration
- Enable Open Badge Compliance For A Badge
- Verify Open Badges
- Configure Open Badge Options In Bulk
1. Enable The Open Badge Integration
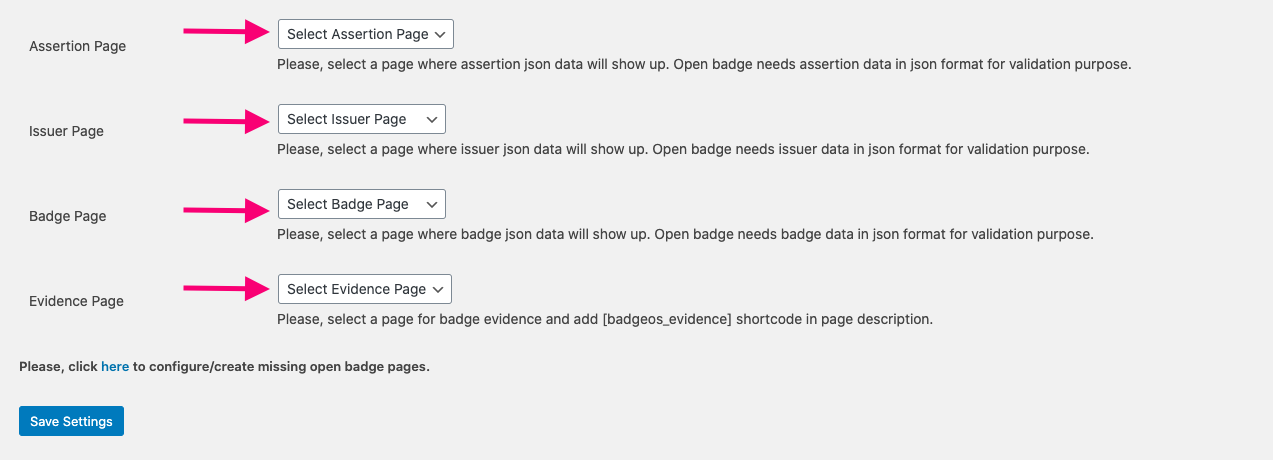
On the Open Badge Settings page, you have to configure the settings for pages. The four pages mentioned below will be auto-generated by the system:
- Assertion Page:
In this Page, the system will store the assertion of JSON data. The open badge needs assertion data in JSON format for validation purposes.
- Issuer Page:
In the Issuer page, the system will store issuer JSON data. The open badge needs issuer data in JSON format for validation purposes.
- Badge Page:
Badge page where badge JSON data will show up. The open badge needs badge data in JSON format for validation purposes.
- Evidence Page:
Here, the user can verify the badge and share the badge on social communities. If you are using a custom evidence page, add [badgeos_evidence] shortcode to the page.
These four pages will help BadgeOS to bake and store all the necessary data into the badges. As these pages are essential for the BadgeOS OB Integration to work correctly, please don’t delete these pages.
Under the Convert Non-open Standard Achievements section, click the “Convert Achievements” button to convert existing non-open standard user’s achievements into open standards. This button will only appear if you have non-open standard achievements awarded to the users.

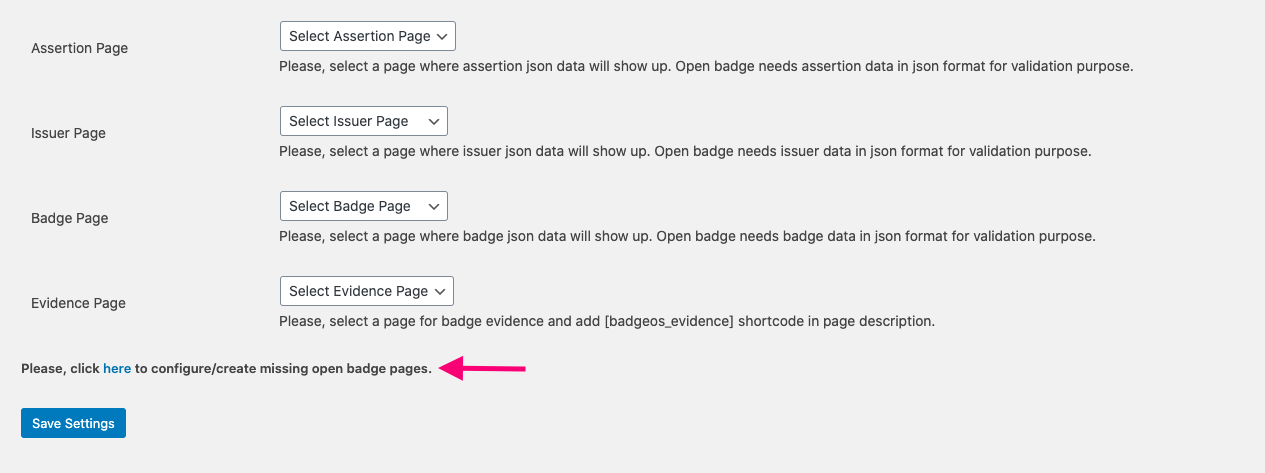
Finally, at the bottom of the page, you will find a link to set up the four OB integration pages with a single click, in case these were not created or are missing.
2. Enable Open Badge Compliance For A Badge
- Scroll down to the Open Badge Options on any individual badge edit page.
- Select Yes for the Enable Badge Baking field.

- In the Criteria field, the badge URL will be automatically added once you publish or update the badge/post. Then, select Yes for Include Evidence field.
- Set Expiration.
3. Verify Open Badges
There are two different ways to verify an open badge. The first option is on-site verification in which the badge is verified directly on the site of the issuer. Alternatively, badges can be verified using 3rd Party Verification platforms.
Verify a badge on your site as the user
To verify a badge, your website users will need access to the evidence page of their earned badges. Users can directly access this page from their profile, earned badges page or any other page with the help of the BadgeOS “User Earned Achievements” block.
To display the badges on any page on your site, follow these steps:
- Navigate to the selected page and click on the “Add Block” icon (+).
- Select the User Earned Achievements Block from the BadgeOS Blocks section. Then set up the block from the right sidebar.
- Select the achievement type(s) you wish to display for the Achievement Types option.
- Publish the Page
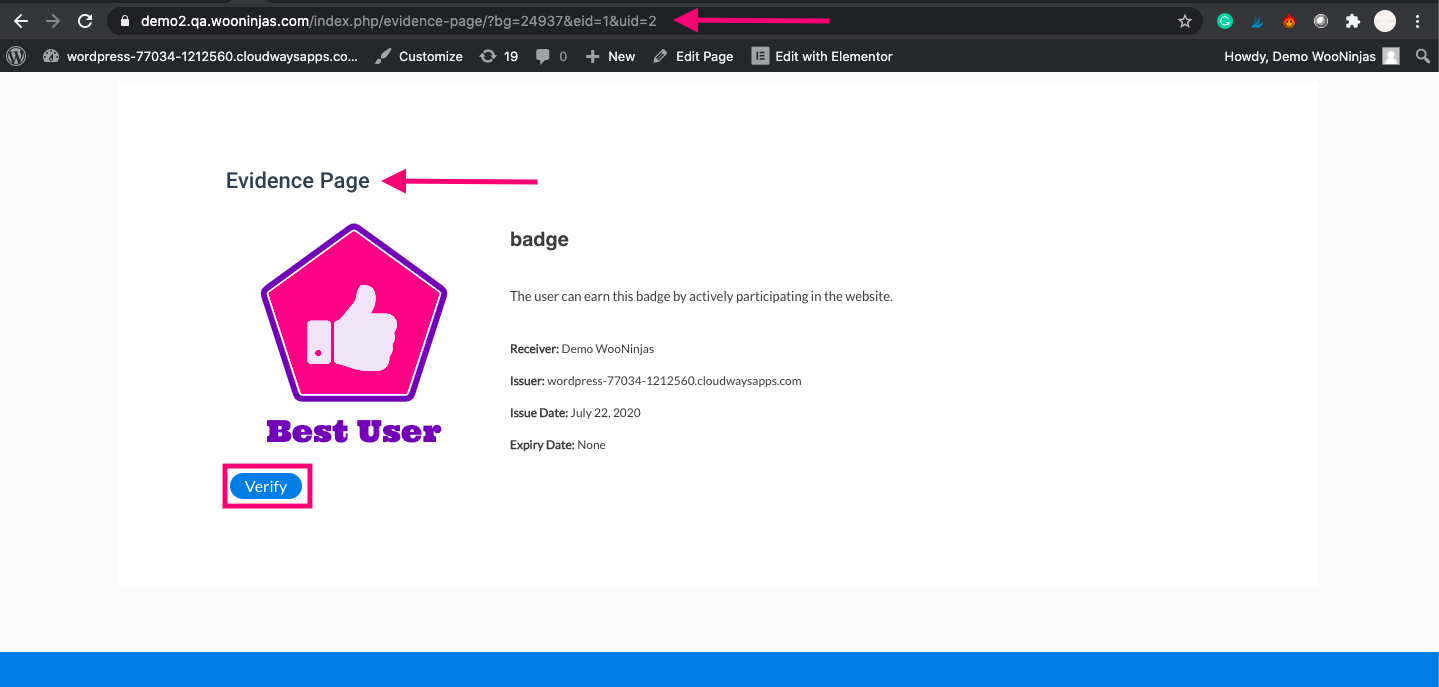
The user will see all of their earned badges wherever the block is displayed. Then the user can click on any given earned badge to be redirected to the badge’s unique evidence page. Here you can verify the badge by clicking on the Verify button. Clicking the ‘verify’ button will open up a popup displaying the result of the verification.
The verification pop-up includes the following information:
- Issued on [date]
- Issued by [issuing organization]
- Issued using BadgeOS
- Issued to [first and last name of the user]
- Expiry date
- A final “Verified” status
Verify a badge on your site as the issuer
You can also verify a badge from the admin account by following these instructions:
- Navigate to the user profile.
- Scroll down to the “Earned Achievements.”
- Click on the “Evidence” link at the front of the desired achievement. It will redirect you to the Evidence page.
- From the Evidence page on your website, click on the “verify” button.
Verify Badges With 3rd Party Verification Platforms
You can also verify badges using 3rd party verification websites like openbadges validator, badgecheck.io, etc.
To use third-party verification tools form a user account follow these steps:
- From the badge’s evidence page, right-click on the badge’s image and download.
- Go to the badge verification website of your choice and upload the downloaded badge png file.
- Click on Verify.

To use a third party verification website, follow these steps from the admin account:
- Navigate to the User’s profile from the Admin Dashboard.
- Scroll down to the achievements section and click on the “Download” link next to the badge.

- The downloaded file will be a baked badge png file.
- Go to 3rd party verification websites like openbadges validator, badgecheck.io, and upload the downloaded badge png file.
- Click Verify.
4. Configure OB Options In Bulk
You can also configure the Open Badge options in bulk. To do so, you have to follow these steps:
- Navigate to the desired achievement types listing page, i.e., Badges.
- Check “title.” It will select all the created badges/achievements.
- Select the “edit” option from the drop-down. Click “Apply.”
- Enable the “Badge Baking?” option.
- Enable “Evidence.”
- Enter desired Expiration in days/months/years.
- Click update.