You can configure as many rank types as you like and call them as you see fit. Some examples of rank types include Grades, Levels, Statuses, Tiers, etc. Within each rank type, you can configure unlimited individual ranks that your users can reach by interacting with your site.
Table Of Contents
1. Create A New Rank Type
Be ready to name your ranks and follow these steps to add a new rank type:
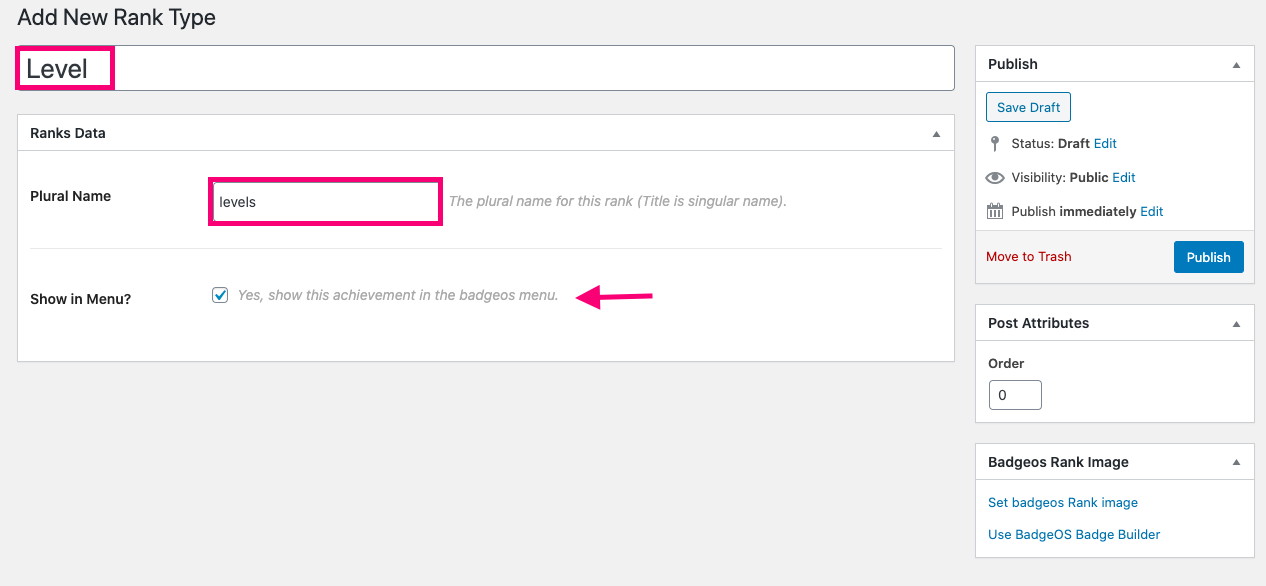
- Select Rank types from the BadgeOS menu and click Add New.
- Add title and plural names for the rank. For example, our rank type will be called ‘Levels.’
- Check Show in the Menu option.
- Publish the post.
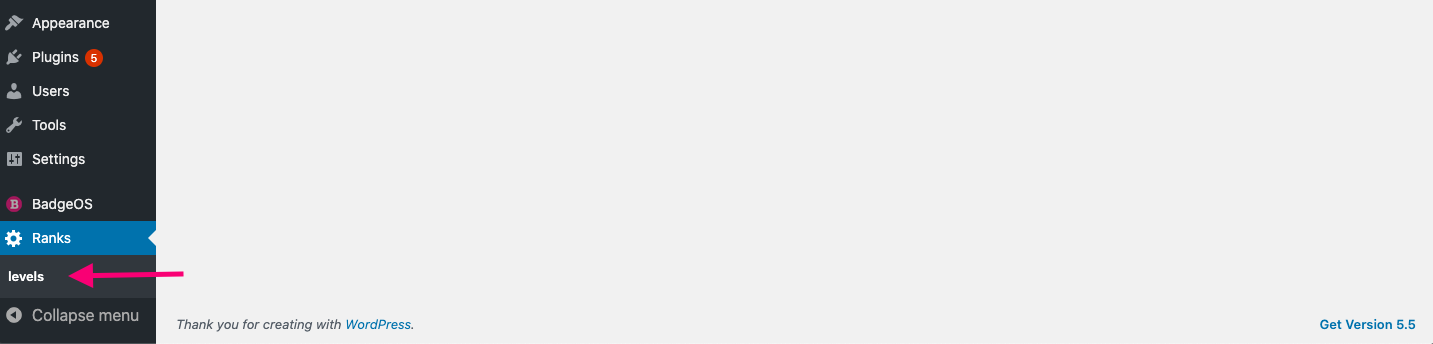
After adding a new rank type, a new section titled “Ranks” will appear under the BadgeOS menu in your main navigation area.
2. Add New Rank
Ranks are generally used to acknowledge your students’ progress and experience level. Your naming convention for ranks might be connected to your brand, or you might use a naming convention that others understand. A straightforward example of that is ‘beginner, intermediate, expert’.’ You can set up as many ranks/levels/grades as you like, but it’s essential to select names that have a particular hierarchy to it.
To add a new rank, follow these steps:
- Select the created rank type from the BadgeOS menu and click on Add New.
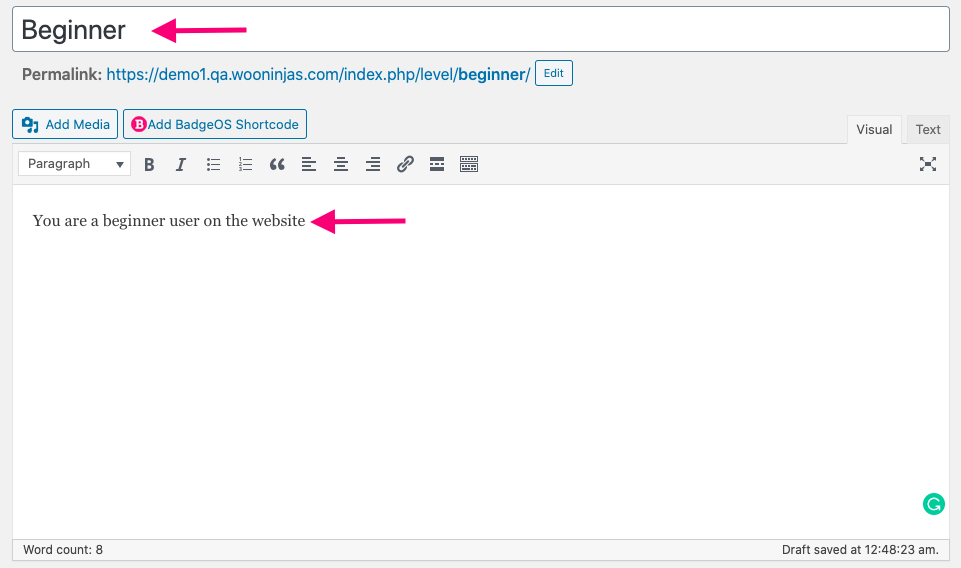
- Add a rank title and description.
- Add a featured image from the meta box on the right side of the edit page.
- If you want to display a different achievement image to users when this achievement is not yet earned, you can select it from the meta-box on the right labelled Not Earned Image.
You can also configure a certain number of points to be earned with rank by following these instructions:
- Enter the “Points Awarded” field with the desired number of points you want to award with earning this rank.
- Select the point type in which you want to award these points from the dropdown field.
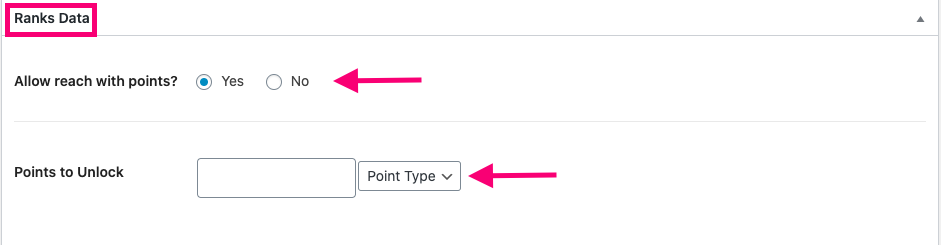
You can configure a rank to be earned by reaching a certain number of points by following these instructions:
- If you want to award the rank if the user reaches a specific number of points of a particular point type, select “Yes” from the field “Allow reach with points?”. The new field “Points to Unlock” will appear.
- Enter the desired number of points in the field Points to Unlock and select the points type from the drop-down.
If there are any actions a user must complete in order to earn the rank, you can define the steps by following these instructions:
- Click on the Add New Step in the Rank Requirement section.
- Select a trigger option from the drop-down for the Require field.
![]()
- Enter the desired number of times the user must complete the action trigger on the Times field.
- Click on Save All Steps.
The rank triggers available with BadgeOS are the following:
- Log-in to website
- Comment on a post
- Comment on a specific post
- Publish a new post
- Publish a new page
- Register to the website
- Daily visit website
- On user Birthday
- Visit a page
- Visit a post
- Reward the author when a user visits a post
- Reward the author when a user visits a page
- After Completing a number of days
- After Completing a number of months
- After Completing a number of years
- Rank for the first X users
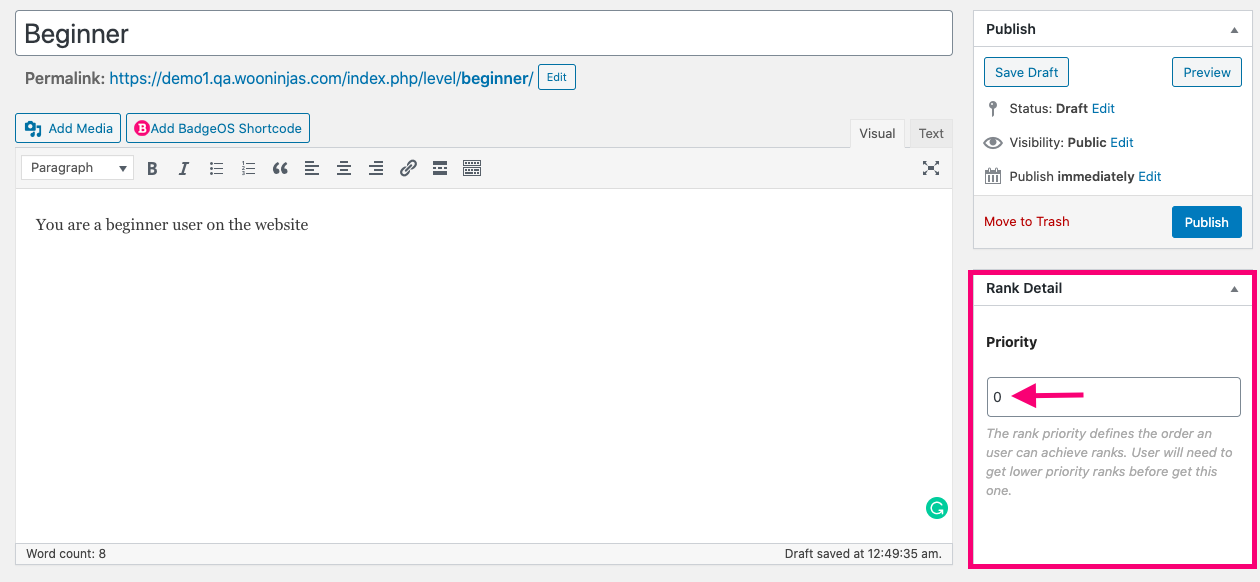
Next, define the rank priority or order in the hierarchy. The rank priority defines the order a user can achieve ranks. Users will need to get lower priority ranks before getting a higher priority one. To select the rank priority, go to the Rank Details meta box, and set the number that corresponds to the order of the rank. If you set the rank priority to “0”, the rank will be awarded to all the users as a default rank.
3. View Earned Ranks
Admins can add the User Earned Achievements widget or User Earned Ranks block to display earned ranks to the site’s users.
The User Earned Achievements widget displays a user’s achievements, ranks and points. To add the User Earned Achievements widget to a widget area, follow these instructions:
- Navigate to Appearance from WP Dashboard and select Widgets.
- Search for the BadgeOS User Earned Achievement Widget.
- Drag or drop the BadgeOS User Earned Achievement Widget to any widget area of your choice.
- Enter a title and number of achievements to display. Enter 0 for displaying all earned achievements.
- Select which rank types to display.
- Select the Point Type that will be shown. Enable the option to display the total points on the front-end.
- Select which Achievement Types to display.
- Click Save.
To add the User Earned ranks block to any page, follow these instructions:
- Navigate to the edit page of any post or page.
- Click on the “Add Block” icon (+).
- Scroll down to the “BadgeOS Block” section or search for “BadgeOS.”
- Select the “User Earned Ranks – Block.”

From an Admin account, you can view any user’s earned ranks from their profile page.
- From the WordPress dashboard, navigate to Users.
- Click on any specific user.
- Scroll down to BadgeOs Ranks.
4. Manually Award or Revoke Ranks
Administrators that meet the minimum role to administer BadgeOS can award or revoke any rank from the user edit profile.
To manually award a rank, follow these instructions:
- Simply, scroll to the Award Ranks section on the user’s profile and click Display Ranks to Award.
- Click on the Award Rank link next to the selected rank to award that rank to the user.

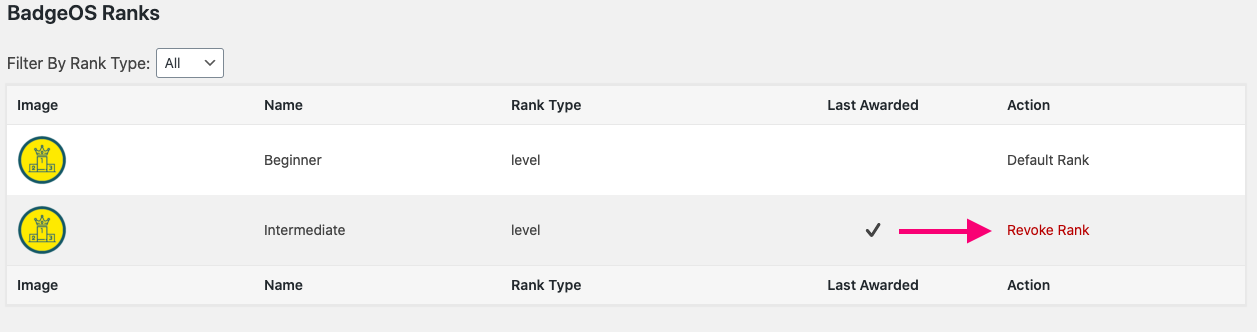
To manually revoke a rank, follow these instructions:
- You will see a Revoke Rank option next to the user’s earned ranks. By clicking on this option, the rank will be revoked.