‘Open badges’ are more than visual achievements, they contain verifiable information that makes it possible to add these badges to LinkedIn or digital CVs. To find out more about how verifiable badges can be used, visit this blog post.
This section will guide you through all the steps on how to create a verifiable badge from the moment you download the plugin to the moment your users see it in their profile.
Table of contents
- Install And Activate BadgeOS
- Enable Badge Baking
- Create An Achievement Type
- Create A Badge
- Enable OB Compliance For Your Badge
- Display Earned Badges
- Badge Evidence Page
1. Install And Activate BadgeOS
- Navigate to Plugins > Add New
- Type in BadgeOS and find the plugin in the list
- Install and Activate
- Once done, you will see the new tab with the name BadgeOS in the main menu:

2. Enable Badge Baking
- A new “OB Integration” option will appear under the BadgeOS menu.

- Clicking the link will redirect you to the “Open Badge Settings page” and automatically create the four necessary pages named Assertion Page, Issuer Page, Badge Page, and Evidence Page. These four pages will help BadgeOS to bake and store all the necessary data into the badges. As these pages are essential for the BadgeOS OB Integration to work correctly, please don’t delete these pages.
- On the “Open Badge Settings” page click “Save Settings”.
3. Create An Achievement Type
Note: The ‘Badge’ achievement type is already added by default and is displayed in the BadgeOS menu to your left. If you want to keep the name ‘badge’, head straight to step 4, however, if you’d like to use a different name (For example, a medal, a mission, a certificate), you will first need to create an achievement type.
Following are the steps to add a new achievement type:
- Navigate to BadgeOS and select Achievement Types, then click on Add New.
- Add Title and add the achievements Plural Name (ie. “Medal” and “Medals”)
- To have quick access to this achievement type from the left menu, check the Show in Menu? option.
4. Create A Badge
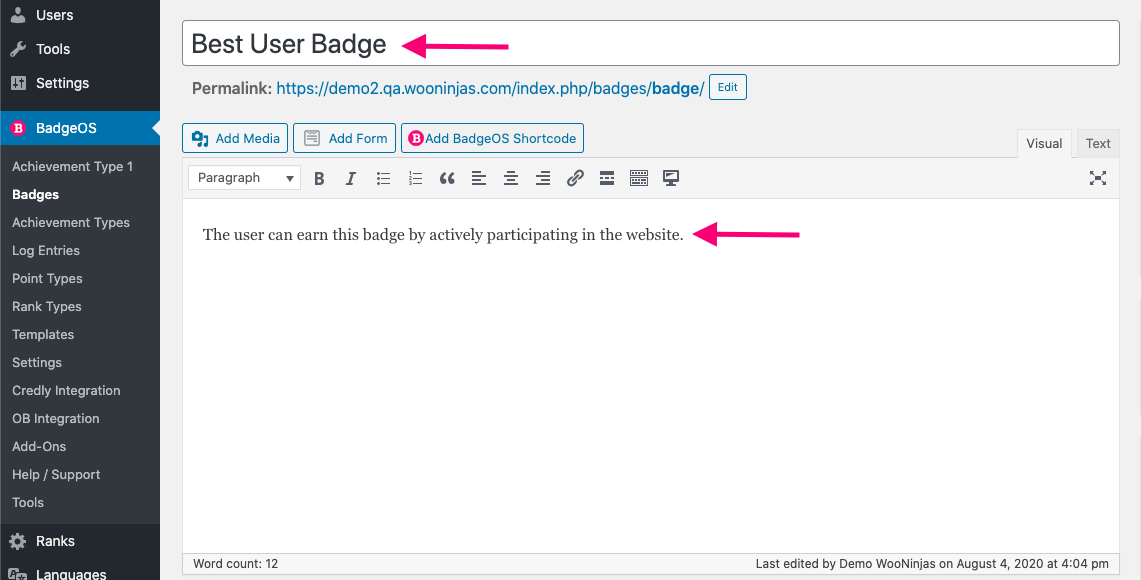
- Click on the tab ‘Badge’ in the main navigation menu;
- Click Add New and add a Title and Description.
- Add the “Required Steps” that the user must complete in order to earn the achievement. For example:

- To reward your users with points every time they receive a badge, add them to the Points Awarded field:
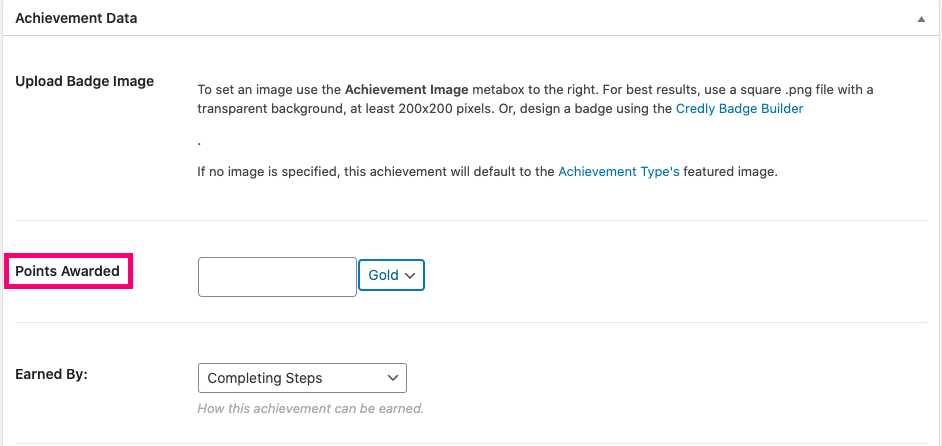
- Next, select and “Earned By” option to define how the badge is earned. If you used the required steps, select the Completing Steps option:

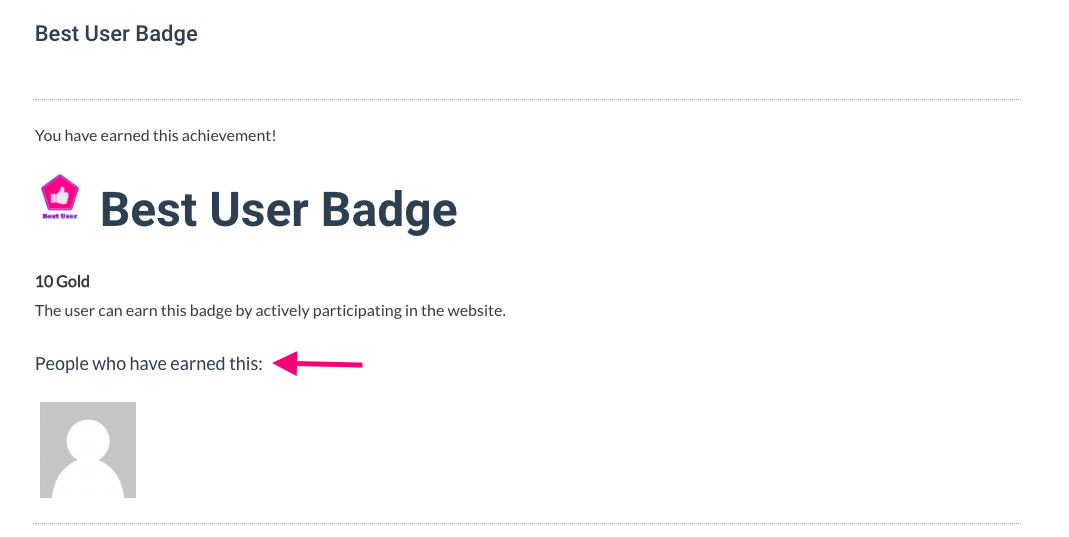
- If the Show Earners option is enabled then a list of users who have earned this achievement will be displayed on the front end:

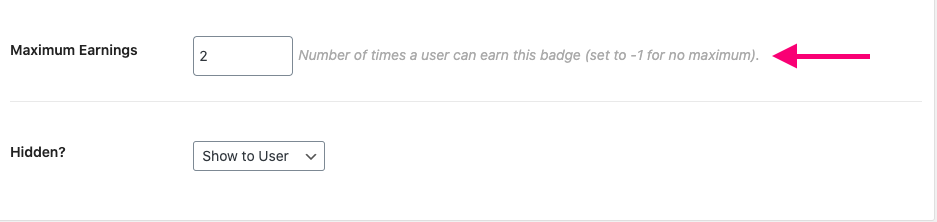
- The Maximum Earnings field defines the maximum amount of times an achievement can be awarded. If you don’t want to limit the number of badges for this activity, insert ‘-1’ or leave the field empty.
5. Enable OB Compliance For Your Badge
- Scroll down to the Open Badge Options.
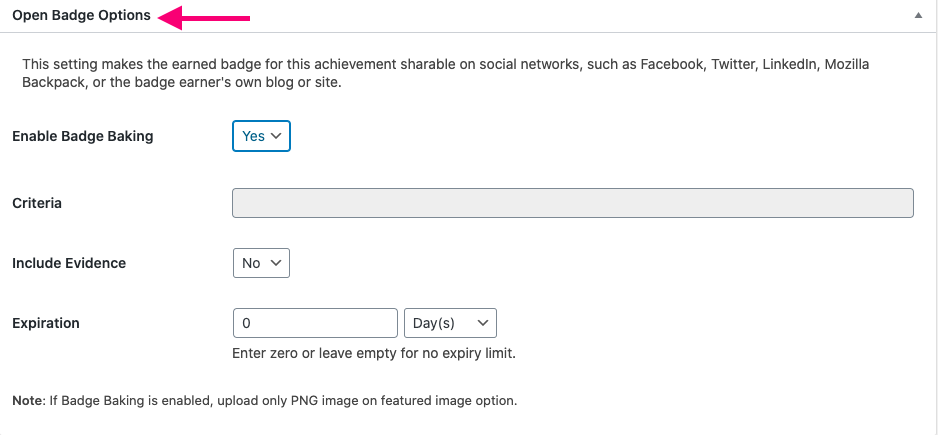
- Select Yes for the Enable Badge Baking field.
- In the Criteria field, the badge URL will be automatically added once you publish or update the badge/post. Then, select Yes for Include Evidence field.
- Set Expiration.
- Hit Publish
6. Display Earned Badges
You can easily display user Badges on any page on your website using BadgeOS blocks. You can give students, members or users quick access to their badges by creating an “Earned Badge” that displays all achievements earned by the user. Alternatively, you can also display badges right on the user’s profile page. To display the badges on any page on your site, follow these steps:
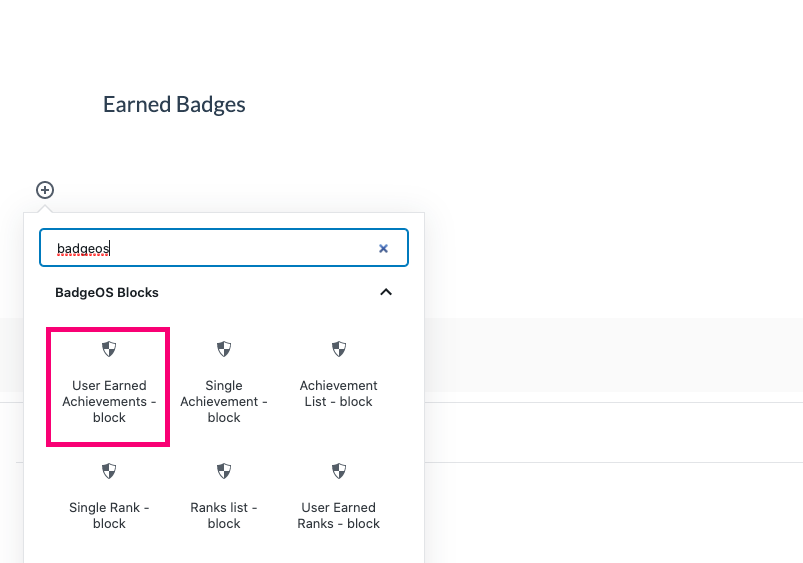
- Navigate to the selected page and click on the Add Block icon (+).
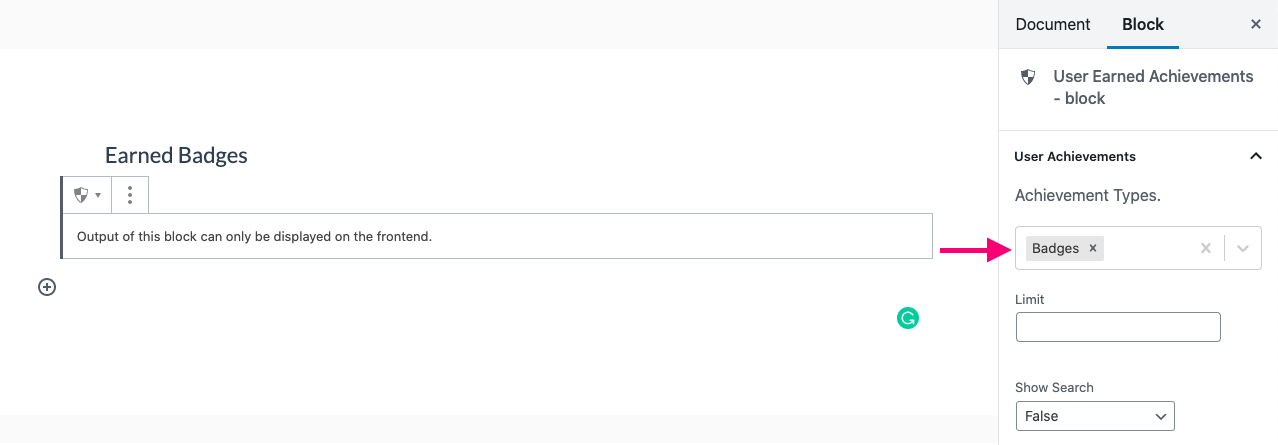
- Select the User Earned Achievements Block from the BadgeOS Blocks section. Then set up the block from the right sidebar.
- Select the achievement type(s) you wish to display for the Achievement Types option.
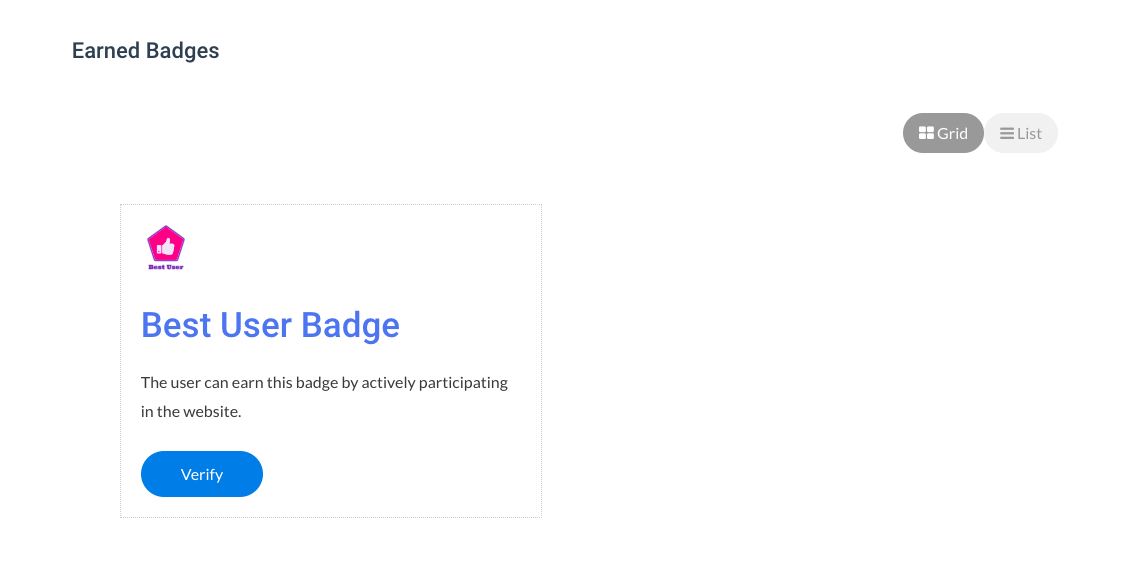
- Publish/Update. This is how it will look like on the front end:
7. Badge Evidence Page
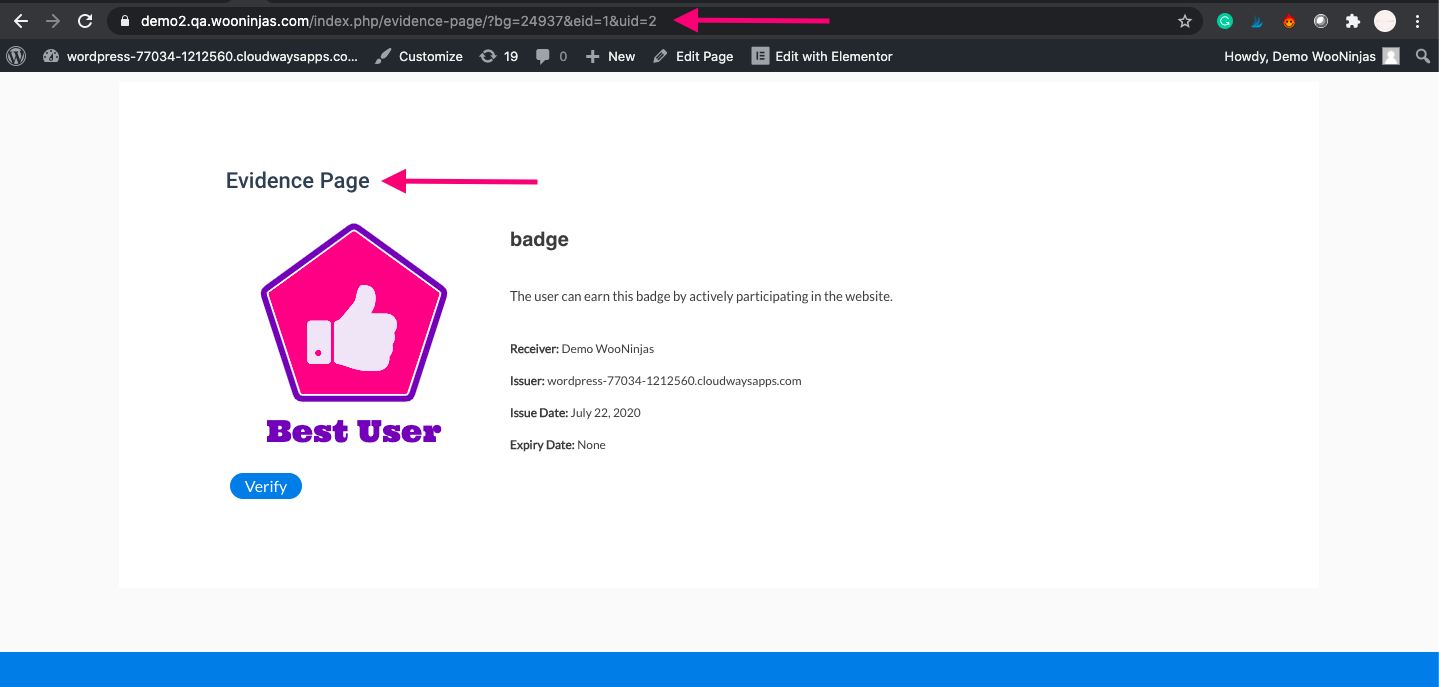
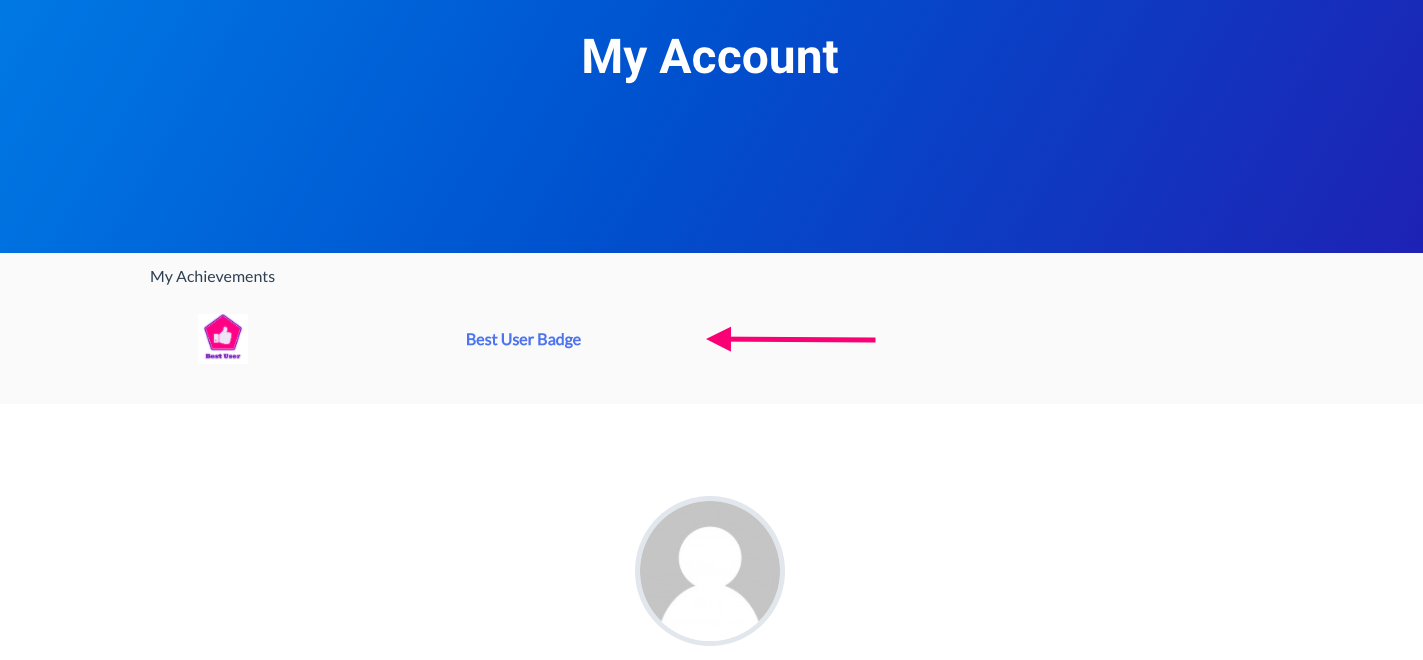
From the admin account, you can view Evidence Pages for each open badge earned by website users. Users can also access achievement Evidence Pages on their own by clicking on any badge displayed on the User-Earned Achievement Block, either on their profile, an Earned Badges page, or elsewhere on the site. The unique evidence page contains all the open badge details and the badge image or icon. Using the Evidence Page’s link, users can easily share their verifiable badges with others, for example by adding it to their LinkedIn profile or through social media.
To access user’s Badge Evidence Pages as an Admin, you can follow these steps instead:
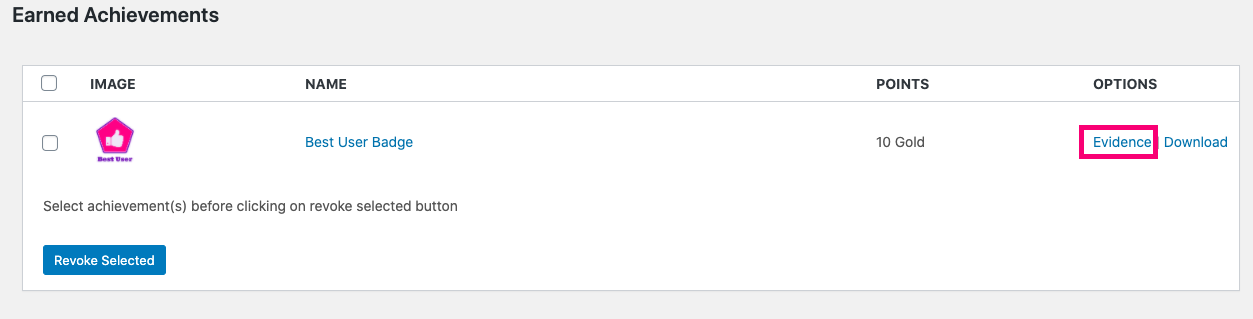
- Select a user from the user list and scroll down their profile page to the Earned Achievements section;
- Click on the Evidence link located on the row next to the selected achievement. This link will redirect you to the evidence page.