A verifiable digital credential or a badge is a visual representation of an accomplishment that can be displayed, validated, and verified online. Receiving a badge after completing a course or learning a skill can be compared to receiving a diploma after finishing school. The diploma contains information that can be verified with the corresponding authorities. The main difference is that this information is 100% digital and can’t be modified or faked. As a result, they can be used to validate skills, knowledge, and participation in online education programs.
You can easily start creating and using verifiable user badges with BadgeOS. Due to its free integration with LearnDash, it is an ideal solution for the creation of verifiable course completion credentials. In this post, we’ll show you how to use the latest version of the BadgeOS plugin to create open verifiable badges that can be easily shared online for your course, organization, institution, or business.
How Are Digital Credentials Used?
Physical awards often end up collecting dust on a shelf at home, where few people can appreciate their value. On the other hand, digital credentials can be shared through social media for everyone to see. Having badges that are easy to share can even help draw attention to your online course, since every time a student shares a badge, others will be able to see them. Additionally, badges can be displayed on any website using the embed code.
Badges are also gaining traction in professional settings including platforms such as LinkedIn. Users can quickly display verifiable badges under their profile’s “Licenses & Certifications” section in order to provide evidence that backs up real skills and knowledge.

For employment purposes, verifiable certificates can be featured in a digital resume or CV. Employers that provide ongoing education or training also have the option to create badges to verify acquired knowledge and skills.
Another example where you can see badges in action is in Amazon. Amazon Web Services (AWS) offers education and training programs. The skills acquired by completing their training can be verified through their verified badges.

Why Choose BadgeOS For Digital Verfiable Badges?
A lot of plugins used to create and award digital badges, certificates, and credentials do not contain verifiable information. The badges or certificates are simply an image or a PDF file. What sets BadgeOS achievements apart is the fact that they contain metadata, with detailed information, that can be verified at the site of the badge issuer or using third party badge verification tools.
Some verification tools that can be used include Badge Check, the IACET Open Badge Verification Tool and IMS Global Open Badges Validator. By uploading the Open Badge image file, these tools can extract necessary information and validate the badge.
When a badge is generated on your site, it has a unique, verifiable link with the name of the receiver. This link will allow your students to add the badge to their LinkedIn profile.
Additionally, the verifiable credentials you create using BadgeOS can be easily shared across different platforms using the Social Sharing Add-on. This plugin allows you to share your achievements with your community and your professional network online. Users have complete control to display their badges on platforms such as LinkedIn, Facebook, and Twitter, and take advantage of badges to publicly validate knowledge or skills and share achievements with their professional and social network.
Additionally, BadgeOS works with many other handy tools for badge creators such as The BadgeOS Badge Builder that allows you to create professional-looking icons or images for your badges and other achievements. You can also display user’s achievements within your own website using the Earned Achievements Widget. With this widget, you can show logged in users what badges/points/ranks users have earned. You can even decide which types of information you want the widget to display.
What Information Do BadgeOS Verifiable Badges Or Certificates Contain?
Every verifiable badge contains embedded metadata that can be accessed by others. There are many details included in a badge’s information, in order to make them valid and trustworthy pieces of evidence that can be used for many educational and employment purposes.
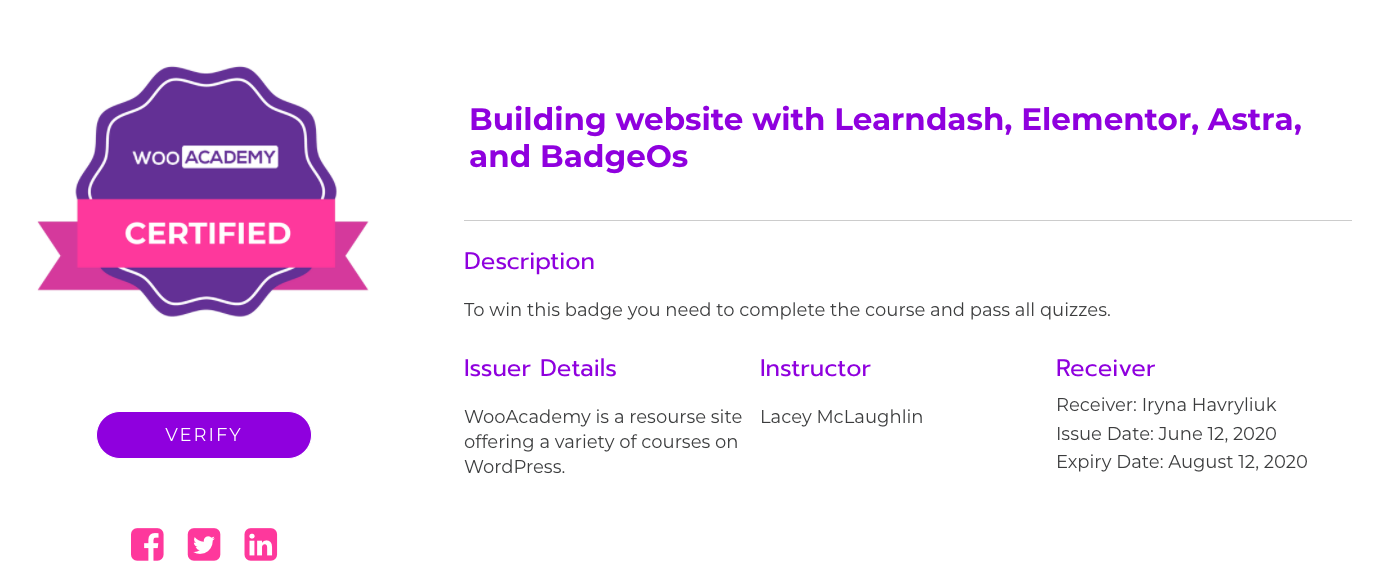
The data includes the following information:
- Badge Icon: The metadata attached to the badge will include the image for the badges icon. This way people can verify that the information corresponds to the image used.
- Badge title and description: First you will locate the badge title, set by the issuer. Next, you will find the badge description that provides details about the purpose of the badge. The description lets people know why the achievement was earned by specifying the requirements met by the user. The description must clearly define what knowledge or skill the badge is validating.
- Badge Criteria: The badge criteria section outlines the specific standards the student or user is evaluated on to earn the achievement. It is important to be specific about what the badge owner knows or can do after earning the achievement so that it can provide more useful information for professional and continuing education purposes.
- Issuer details: People want to know what institution or organization awards a badge since a recognized badge issuer can give an achievement additional prestige. With the upcoming BadgeOS update release, badge information displayed in the Evidence Page will include issuer details.
- Receiver details: It is important that each badge provides information to identify the person that receives it. This gives the badge more credibility since others can’t pass it off as their own. Some of the information included in the badge is the full name of the badge receiver, the date when the achievement was earned, and its expiration date (if there is one).
- Evidence: The evidence section allows the user to attach evidence to back up the claims of the badge.
How To Create Verifiable Badges With BadgeOS?
BadgeOS has an easy-to-use interface to set the required steps for earning each badge. With integrations, you can define specific actions users must complete to earn a badge. You can customize your badge from a simple user-friendly edit page from the back-end. Here you can define how the badge will be earned, if earning the badge will allow the user to earn any points, and even set a congratulations message.
To create a badge, you will first need to download the BadgeOS plugin and install it on your WordPress website. To be able to create an Open Badge Compliant badge, make sure you are working with the latest version of BadgeOS.
Get started by setting up a badge by following these instructions:
- Go to the new BadgeOs Menu and navigate to Badges and click on Add New. To create a different achievement other than a badge, you must first create that new achievement type.
- Add a badge title and description.
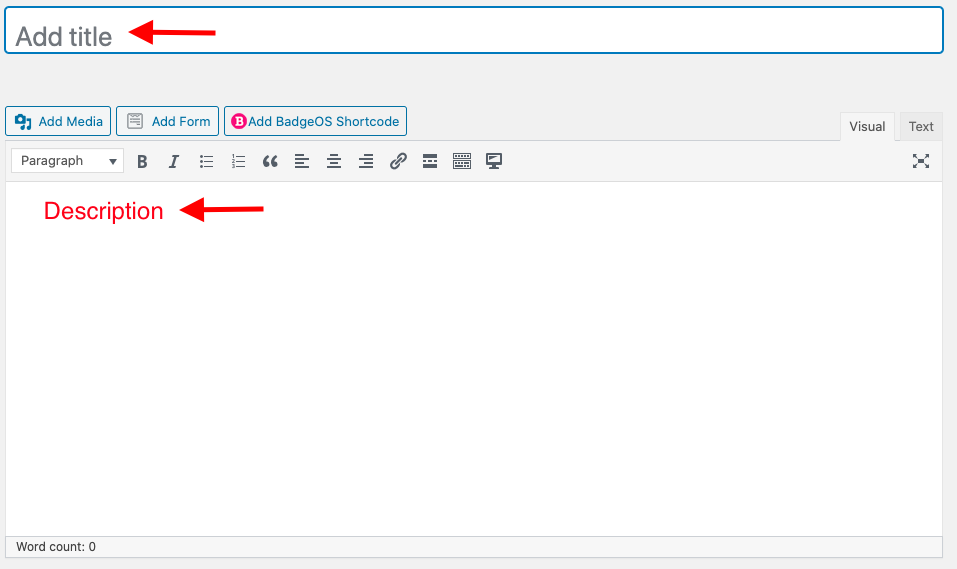
- In the Achievement data page, select how the badge will be earned using the drop-down menu next to the “Earned by” heading. Badges can be earned by reaching a certain number of points, by submission or by completing steps.

- For badges earned by completing steps, go to the Required Steps interface and click on Add New Step to define the steps that must be completed for the badge to be earned.

- If you are setting up a badge for the completion of one of your LearnDash Courses, try the Badges LearnDash integration, that allows you to use LearnDash activity triggers for your badges.

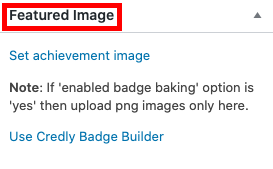
- Add the visual component of the badge by uploading an image in the featured image section. Your badge image can be designed using the BadgeOS Badge Builder. To create open badges, please use PNG image files.
Making Your Badges Open Badge Compliant
With the latest version of BadgeOS, we have introduced verifiable badges with Open Badge Compliance, allowing you to incorporate badges that are fully verifiable and easy to validate online with one single tool for free. You can modify the Open Badge Integration settings by following these instructions:
- From the WordPress dashboard navigate to BadgeOS and select OB Integration from the Menu.
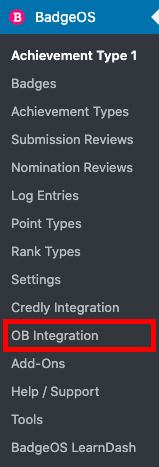
- On the Open Badge Integration Settings, you will be asked to select the necessary pages for badge validation. To create these pages simply click on the link below the menu, as selected in the image below.
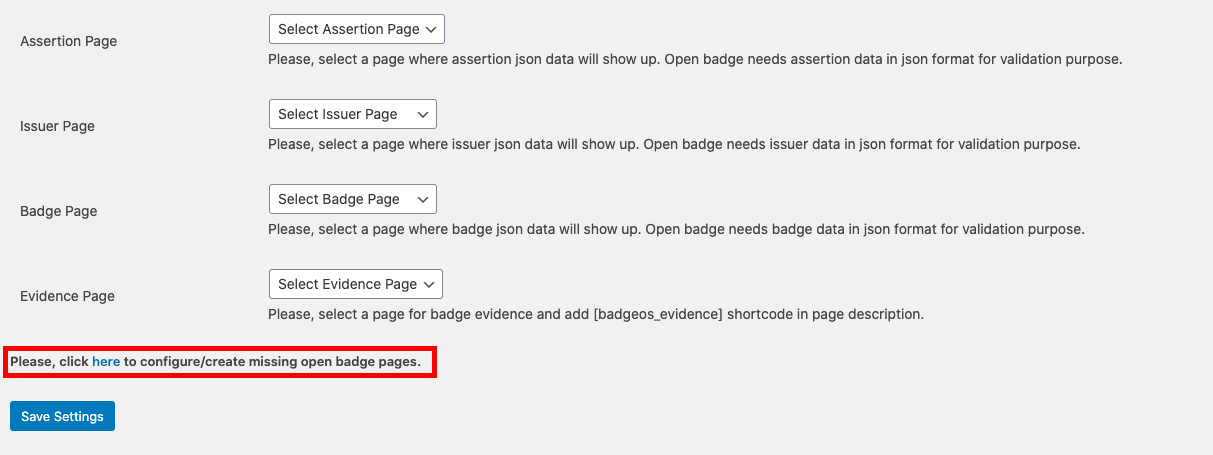
- Assertion, Issuer, Badge, and Evidence pages will be automatically created and selected in the corresponding drop-down menus as shown.

- If you choose to not automatically generate the pages and want to manually create them, make sure to add the following shortcode [badgeos_evidence] on the Evidence Page.
- If you were previously using non-open badges, you can convert them to open verifiable badges by clicking on the button under “Convert Non-Open Standard Achievements”.
- Don forget to save the settings.
Most Open Badge validators work by examining the metadata contained in the badge image that contains assertion information. For a badge to contain information, this information must be added. “Badge Baking” is the process of adding badge information such as title, description, badge issuer, and receiver data, expiration date, etc into the badge image. This way, when a user uploads that badge on a software that is Open Badge aware, it can automatically extract that data from it and perform the necessary validations to confirm that the user legitimately earned the badge.
In order for Open Badge Compliant achievements to be created, badge baking must take place first. To bake your badges, you will have to enable the option for it from the badge’s edit page. Badge Baking isn’t enabled by default. To enable badge baking, follow these instructions:
- From the dashboard go to the BadgeOS menu and select badges
- Click on the badge you want to enable Badge Baking for
- From the edit page, scroll down to the Open Badge Options section. Here set the Enable Badge Baking option by selecting Yes from the menu.

- Once you enable badge baking, the menu in this section will expand. Go to the criteria heading to specify badge criteria.
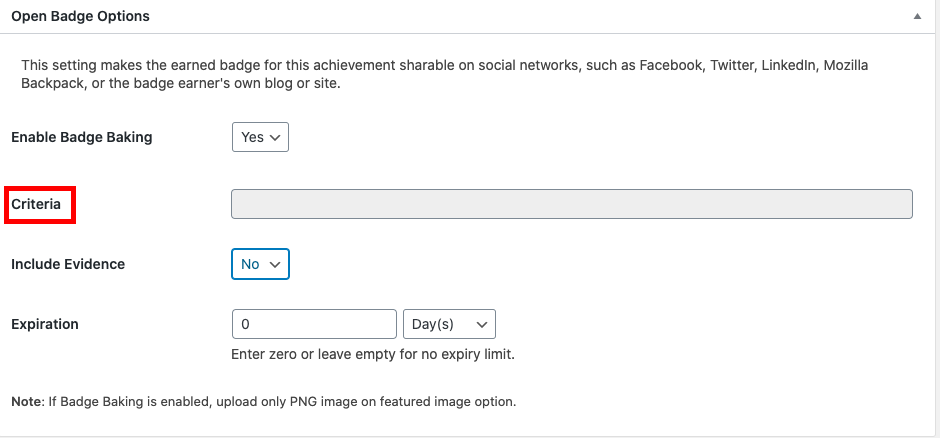
- You can also select whether to include badge evidence and specify badge expiration details if any.
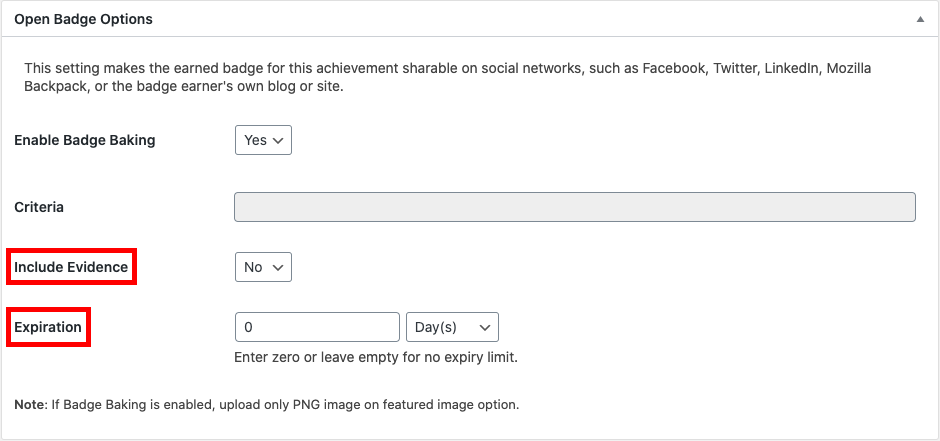
When a user earns a badge and badge baking is enabled, the system will take all the necessary data from the database and embed it into the badge.
Displaying A Badge
As mentioned previously, you can display open badges and credentials in many different ways. Baked badges can be displayed in different websites and validated online with different tools. Their information is also displayed in the “Evidence Page”. With the current version of BadgeOS, the Evidence Page can be accessed only by the admin. To reach the Evidence Page you should follow these instructions:
- Select “Users” from the admin WordPress dashboard.
- Click on the chosen User and scroll down to the Earned Achievements section. Here you will find a list of all the achievements the user has earned.
- Next, click on the evidence button located to the right of the row for the selected achievement.

- This will direct you to a unique user evidence page, containing all badge information.
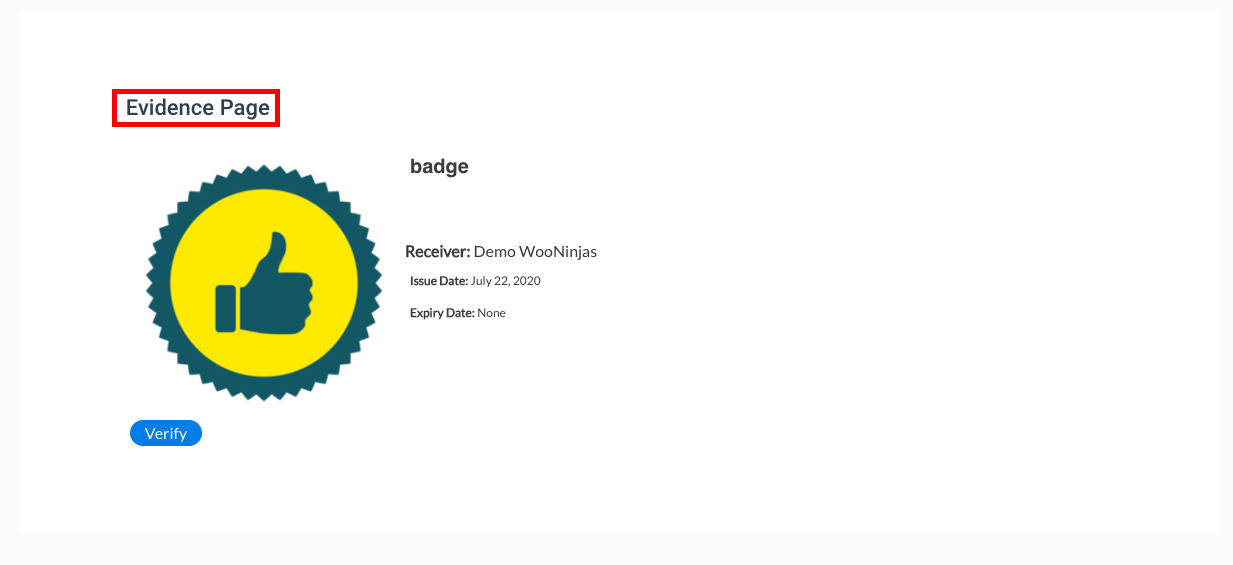
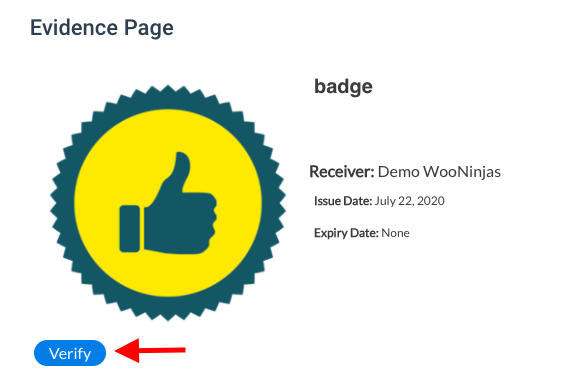
- By clicking on the “verify” button on this page, badge data will be verified directly.
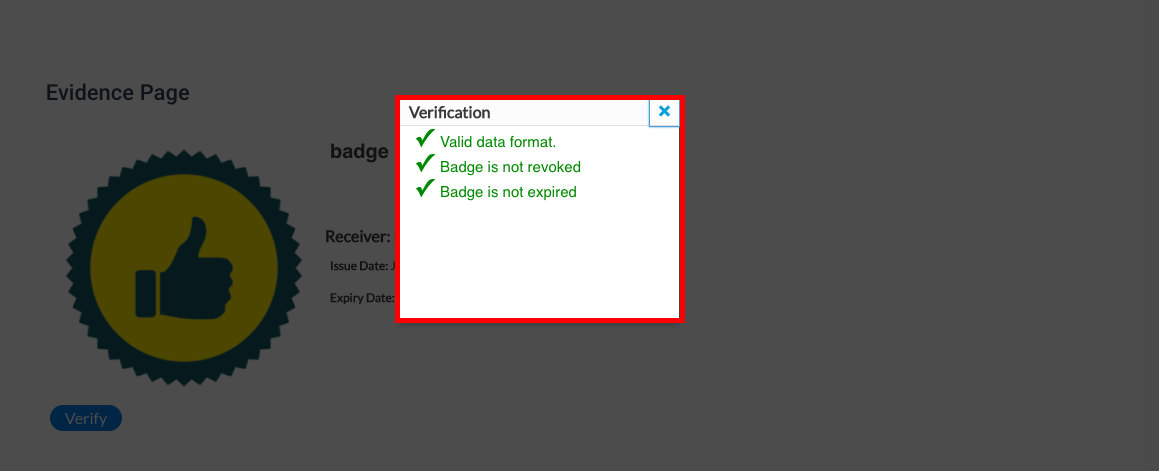
In the upcoming BadgeOS update, students will also have access to their badges’ evidence pages from their own accounts.
Badges can be added to LinkedIn profiles and shared on Facebook, Twitter, and LinkedIn Posts with the Social Sharing Add-on.
You can also display the user badges directly on any widget area of the website using the Earned Achievement Widget. To display a badge on your site, follow these instructions:
- From the WordPress dashboard, navigate to the Appearance section and select “Widgets”.
- Locate the “BadgeOS Earned Achievement Widget” under the “Available Widgets” section.
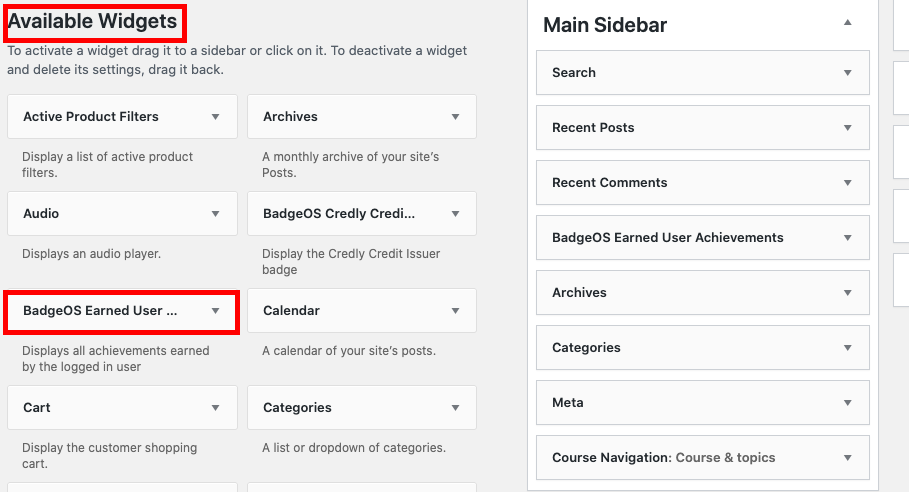
- Drag and drop the widget into the desired area of the sidebar or any other widget area of your preference.
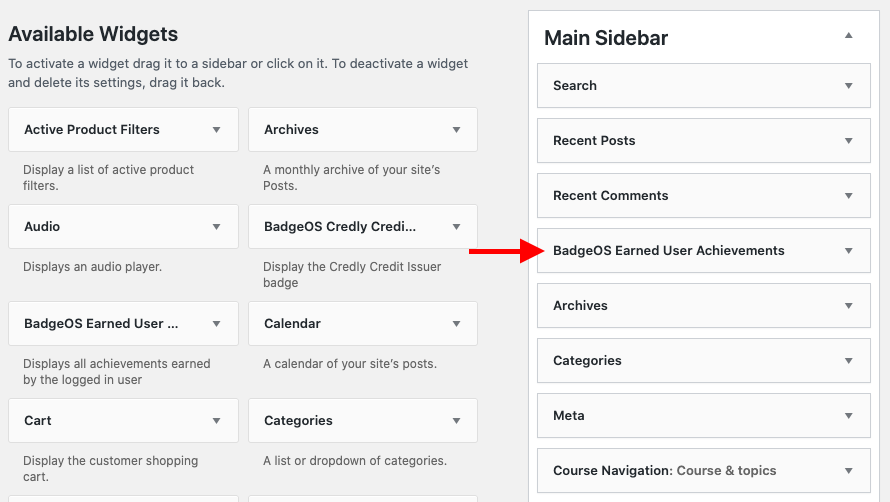
- Enter the Title you want to display and set the number of achievements you want to be visible in this area. If you want all user earned achievements to be displayed enter “0”.
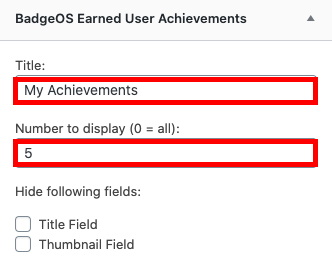
- Select the achievement, rank and point types you want to display and give each section a title.
- Save your changes.
Conclusion
Create verifiable badges that can be easily shared online for your course, organization, or business with BadgeOS. Find out how in this post. Click To TweetWe hope this article was a useful introduction to the world of verifiable digital credentials and helped you set up verifiable badges for your own website or organization. If you still have some questions, please leave us a comment below! We’d love to hear about your experiences. If you need further help implementing badges and digital credentials to your website, let us know. Our offer includes a reward system design and badge configuration. Leave us a message if you are interested.
How can a user download their badge from their profile? I already purchased the social sharing addon. Also wen setting up everything as listed here, users get a “convert to open badge” button instead of verify. Is there something we are doing wrong?